A Closer Look
WRIGHT
BROTHERS Aeroplane
Company
A Closer Look
![]()
![]()
![]()
![]() he Wright
"Kite" was the Wright brothers first aeronautical experiment.
Actually, it wasn't a kite at all but a small glider designed to test a
revolutionary new method of controlling an airplane. Early in the summer of
1899, Wilbur Wright had discovered that he could twist or "warp" the
wings of a biplane by drawing the "corners" (where the struts joined
the wings) together with cables. When the wings twisted, the angles of attack
(the angles at which the wings meet the wind) changed -- one end of each
wing would be angled up, producing more lift, while the opposite ends were
angled down, producing less. This would cause the biplane to roll. This
is what history remembers as the aileron principle, and it was the first
step toward producing an effective control system for an airplane.
he Wright
"Kite" was the Wright brothers first aeronautical experiment.
Actually, it wasn't a kite at all but a small glider designed to test a
revolutionary new method of controlling an airplane. Early in the summer of
1899, Wilbur Wright had discovered that he could twist or "warp" the
wings of a biplane by drawing the "corners" (where the struts joined
the wings) together with cables. When the wings twisted, the angles of attack
(the angles at which the wings meet the wind) changed -- one end of each
wing would be angled up, producing more lift, while the opposite ends were
angled down, producing less. This would cause the biplane to roll. This
is what history remembers as the aileron principle, and it was the first
step toward producing an effective control system for an airplane.
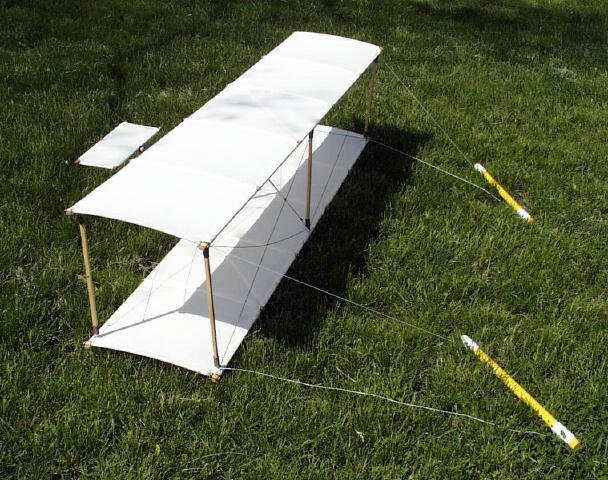
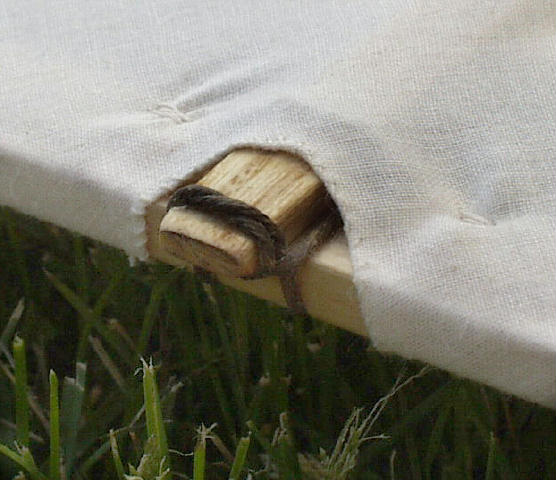
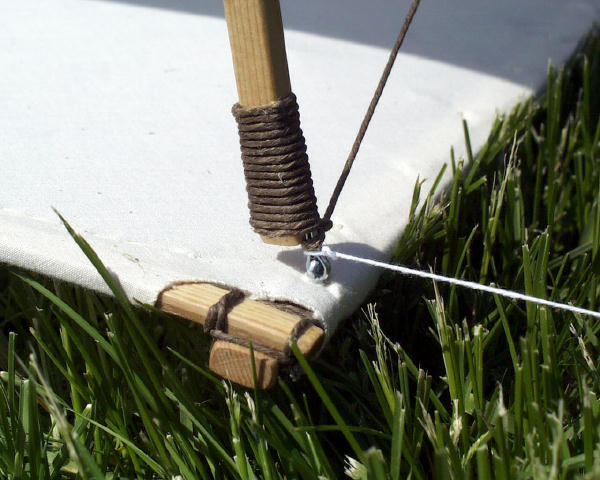
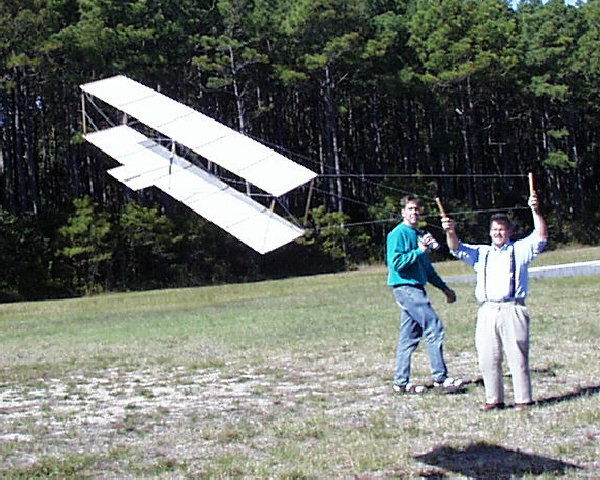
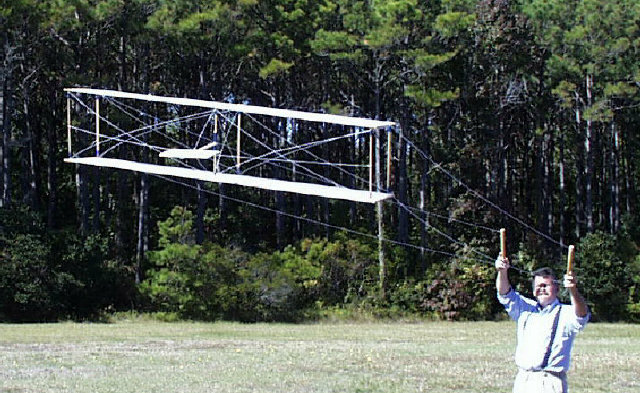
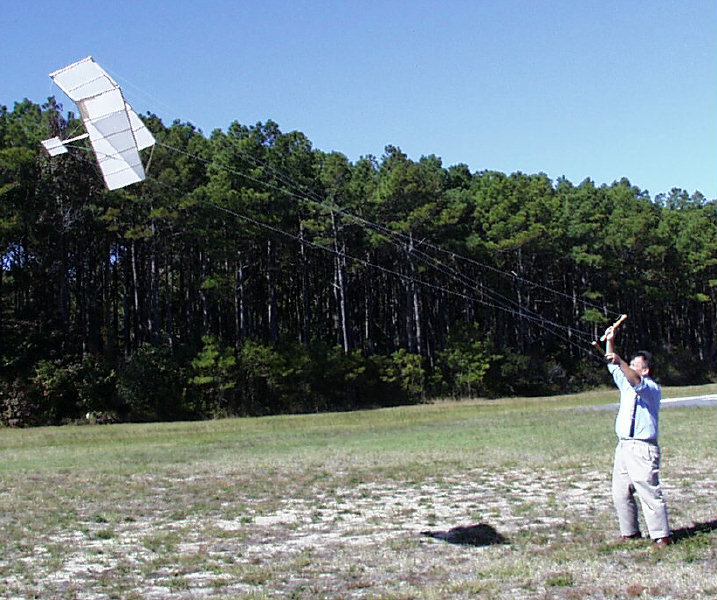
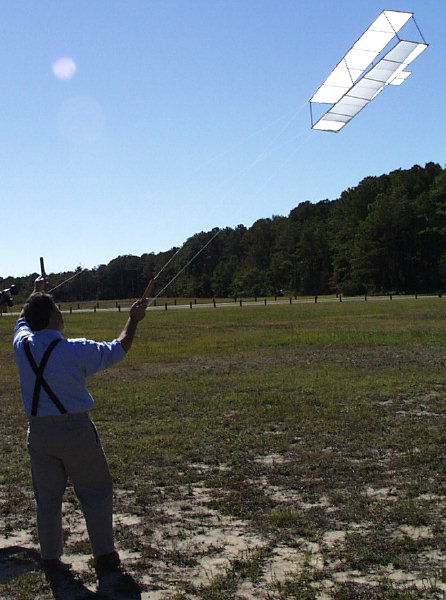
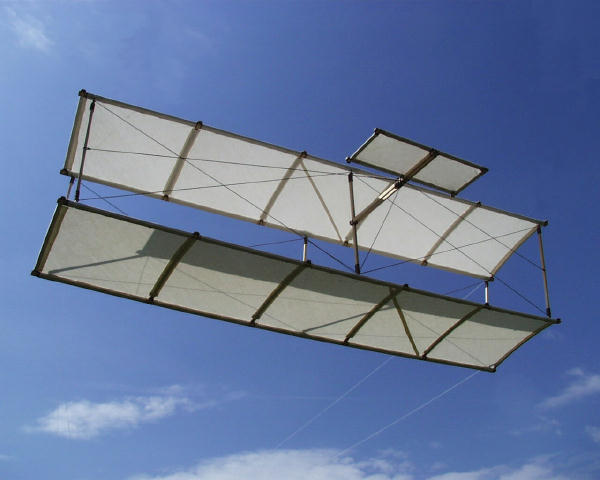
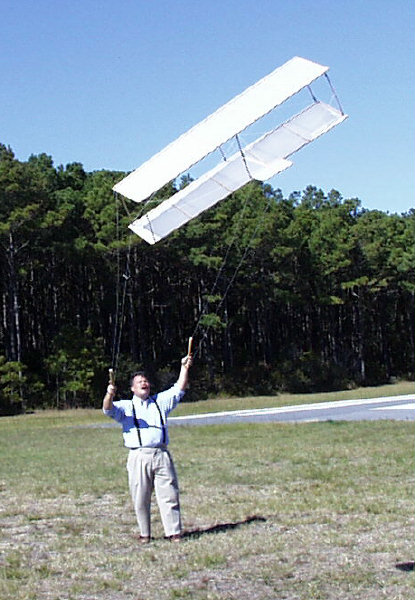
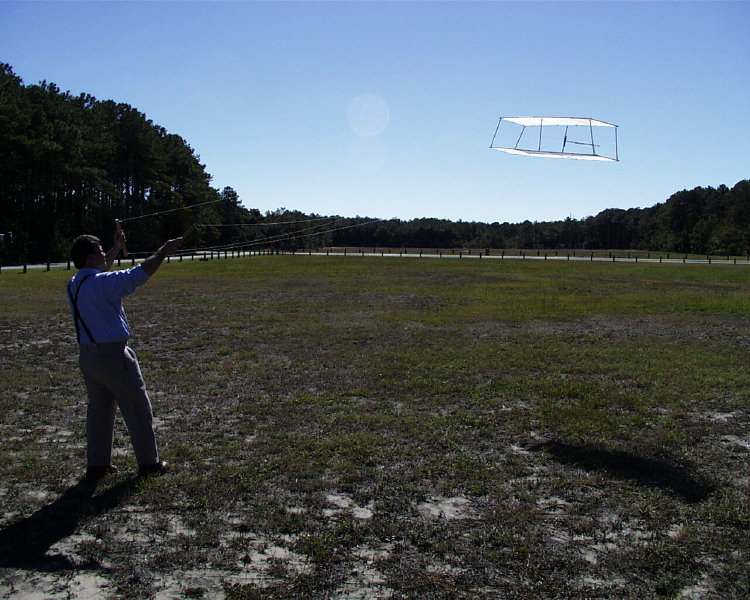
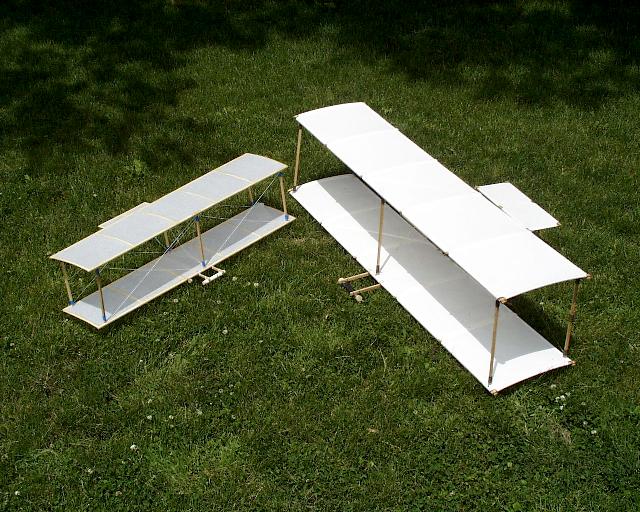
Wilbur built a small glider with a 5- or 6-foot wingspan, patterned after the "double-decker" glider which Octave Chanute first tested in 1896. Wilbur, however, eliminated the fore and aft bracing wires and attached the wings to the struts with "wire hinges" -- cotter pins looped through one another. This allowed the wings and struts to move back and forth. He attached control lines to the four front corners of the model, allowing him to twist the wings from the ground. When he flew the kite in late July of 1899, it behaved precisely as he hoped -- he could roll it right or left with a small movement of his wrists. Thus encouraged, he and Orville planned their first man-carrying glider.
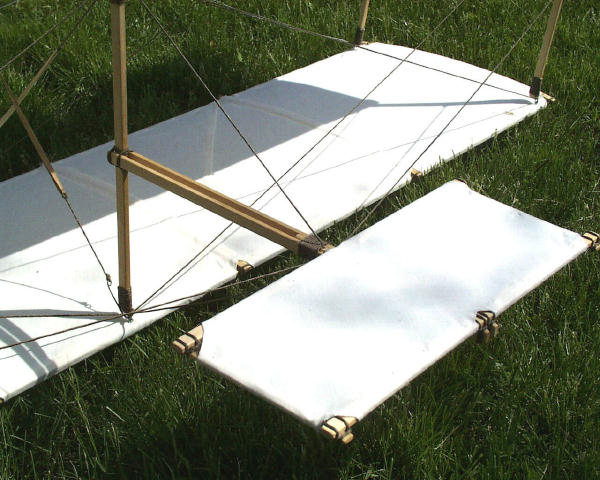
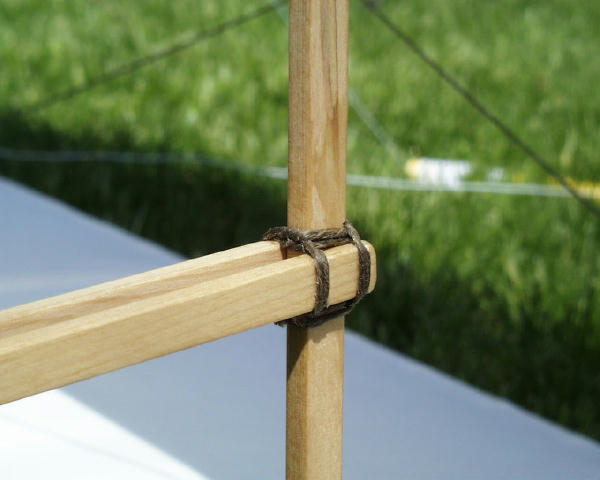
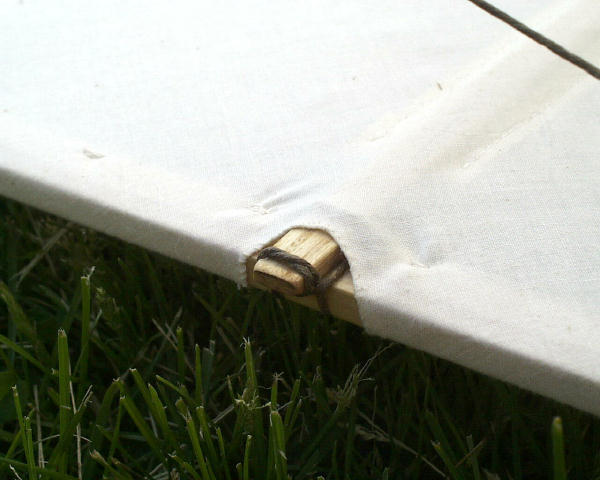
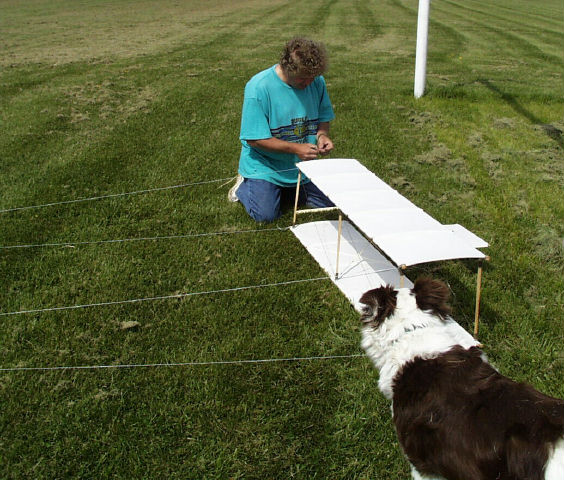
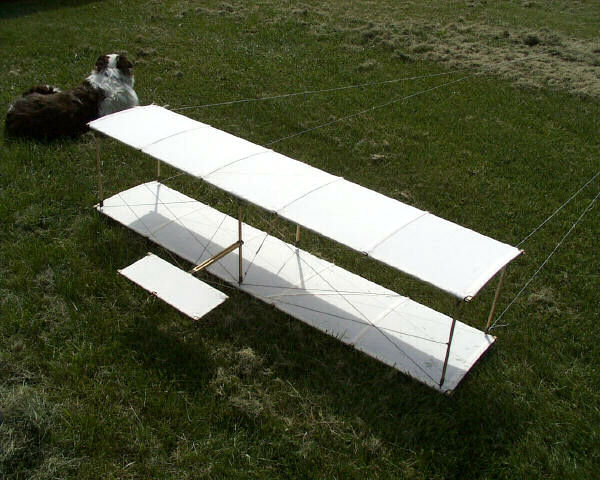
We built and flew the reproduction shown here in 1999, exactly 100 years after Wilbur had tested the original. There wasn't much to go on. There are no pictures of the kite, and the only drawings are three small sketches that Wilbur made in 1912 for the Wright patent suit against Glenn Curtiss. Wilbur gives some very sketchy descriptions in a few letters, but hardly enough to build a copy. Instead of working from plans or photos, we reviewed the aeronautical information the Wrights had gathered in 1899, the glider designs they were familiar with, the Wright glider design that came after the kite, and the tools and materials they worked with. After a few harrowing flying experiments of our own, we arrived at the configuration you see here. His kite has a spruce and ash frame lashed together with waxed linen "lacing cord." It's covered in muslin set at a bias to the ribs and spars -- the warp and woof threads run at angles to the frame parts, helping to brace it.
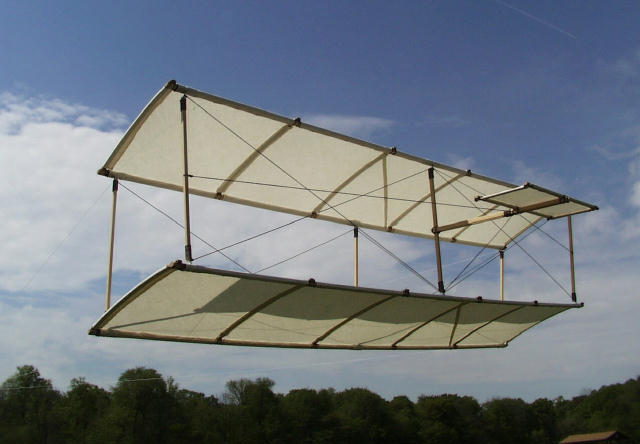
We departed Wilbur's sketch in two important ways. First -- and most important -- the wing camber is completely different. Wilbur shows deep arch -- a section of a circle. When we copied this, the kite was too unstable to fly. The deep arch caused the center of pressure on the wing to reverse itself with small changes in angle of attack, traveling back and forth so quickly that the kite actually fluttered in the air like it was going to shake itself to pieces. After getting some advice from a professional kite designer, we found that a shallow elliptical camber or even a flat camber is much easier to control. Wilbur and Orville must have made the same discovery. This would explain why they showed up in Kitty Hawk in 1900 with a glider that had a shallow, elliptical camber when the prevalent aeronautical wisdom of the time was to use a deep arch. The camber on the kite shown here is about 1/20, with the peak close to the leading edge -- the same as the 1900 glider.
The second departure is that we simplified the wing construction, eliminating the wires at the leading a trailing edges and moving the spars out to the edges. The Wright brothers never made an airplane with wires at the leading and trailing edges; we sincerely doubt that they would have done so for a kite. They Wrights rarely built anything on their aircraft that wasn't functional and necessary; there is no reason to presume that they weren't just as careful when building kites. The point of this particular kite is test whether wing warping is an effective aerodynamic control. All that was required was a simple rectangular frame. Remember, Wilbur made the kite sketches 13 years after building the kite. His sketches were copied and given a more professional look by a court illustrator who may or may not have had some familiarity with airplane construction. You can't take the 1912 sketches as gospel.
![]()
![]()
![]()