|


Meanwhile:
How about a
little music?
We have a selection of tunes that were
popular during the first days of aviation, performed by Sue Keller, courtesy the
Ragtime Press:
Want to ask a question? Tell
us something? Arrange a showing of one of our airplanes? Ping:
mailto:[email protected]
| |
 hinking about building a Wright aircraft, either
for your own personal gratification or for an aviation event or museum? Do you want to build something with a great
deal of historical significance? Are you looking for a project that you
can make with moderate skills, and without making a large investment in
tools, machinery, materials, and time? Are you looking for an aircraft
project in which kids can participate? The 1902 Wright Glider fits all of
these criteria. hinking about building a Wright aircraft, either
for your own personal gratification or for an aviation event or museum? Do you want to build something with a great
deal of historical significance? Are you looking for a project that you
can make with moderate skills, and without making a large investment in
tools, machinery, materials, and time? Are you looking for an aircraft
project in which kids can participate? The 1902 Wright Glider fits all of
these criteria.
With a 32-foot wingspan (larger than most light aircraft), it is an
impressive flying machine. With the elevator in the front and the rudder
in the back, it is immediately recognizable as a Wright aircraft. And it
is one of the most significant aircraft the Wrights ever built, the first
machine in history with 3-axis controls. To find out just how significant,
read It All Began Here. It
explains how the 1902 Wright Glider is the true granddaddy of everything
that flies.
It's not an inexpensive project, but you can build an
historically-accurately copy for between $2500 and $3500. (For sources of
materials, see Aircraft
Materials.) Building it is
simple and straightforward. Anyone with some modest skills can build one
in a few months. In fact, you don�t even have to have any aviation
experience to build a replica and do a good job of it, too. After all, the
original designers had very little experience when they built the glider
for the first time.
The real trick is finding a good set of plans, and that's where we can
help. Click on 1902 Glider Plans. We've put together 20 sheets of
engineering drawings that you can download with our good wishes for a
great Centennial. You might also want to take a look at the 1909
Wright Glider, a copy of the 1902 glider that several English
pilots used for flight training in 1909.
|
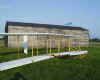
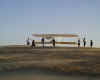
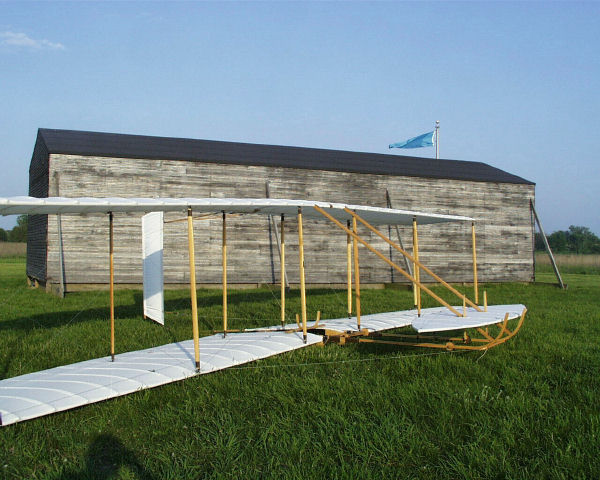
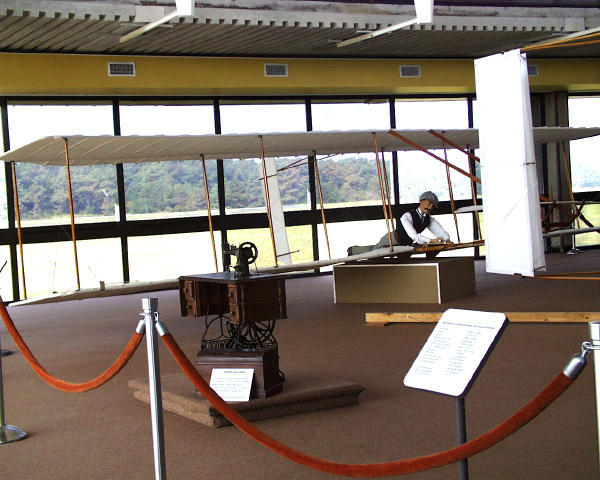
Our 1902 Wright Glider replica on display at Huffman
Prairie, where the Wright brothers developed the airplane.

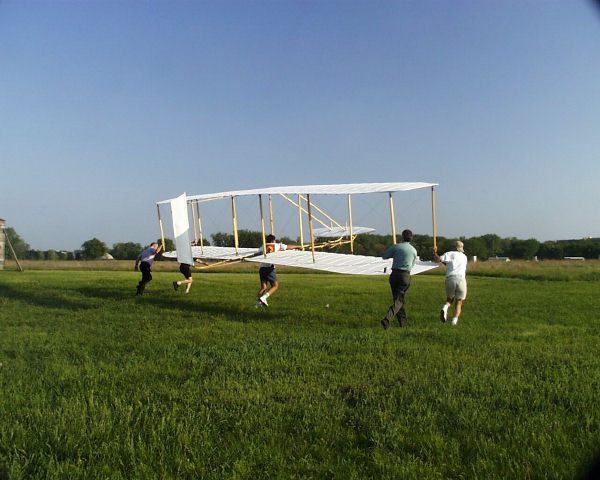
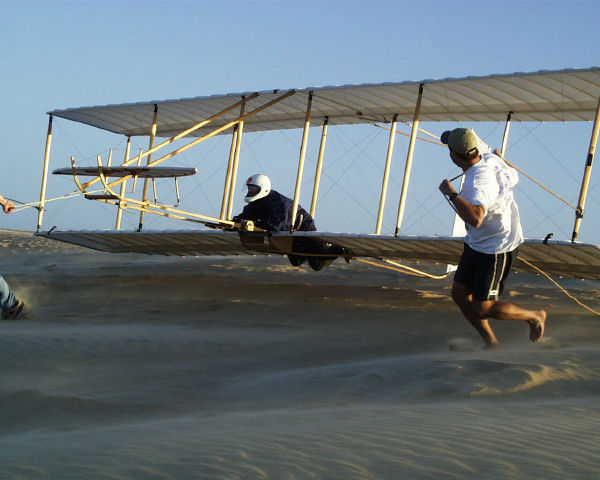
"Taxi tests" at Huffman Prairie. We ran
the glider into a strong wind, testing the lift and the controls. This may
be the only Wright aircraft other than the original 1905 Wright Flyer 3 that has flown at both Huffman Prairie and
Kitty Hawk.
|
Our Experience
If you'd like to know something of our experience with this
project before you begin, here's a brief overview. We decided to make a
replica of the 1902 glider for several reasons, none of which had anything
to do with its historical significance. The first and best reason was that
kids would think it was cool. The purpose of our l educational
organization, the Wright Brothers Aeroplane Company, is to tell the
Wright story. And there is no better way to tell an aviation story
than with an airplane. A Wright airplane, we thought, was just the ticket
to get the kids riled up about the birth of Aviation.
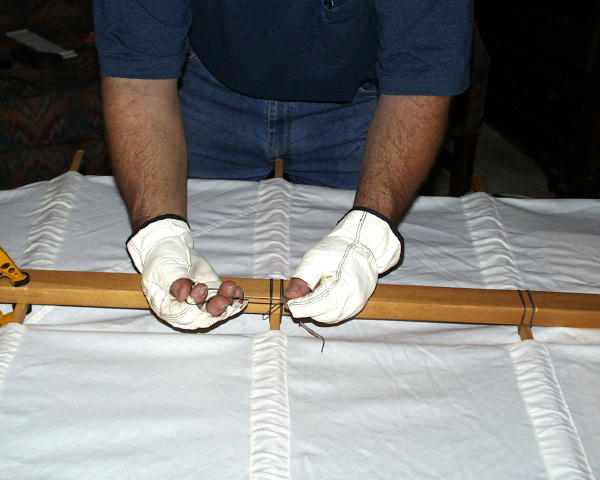
We also knew that a glider should be easier to transport and set up
than a powered Flyer. And with a 32-foot wingspan, it would be just
as impressive. But how could we make a 32-foot-long object conveniently
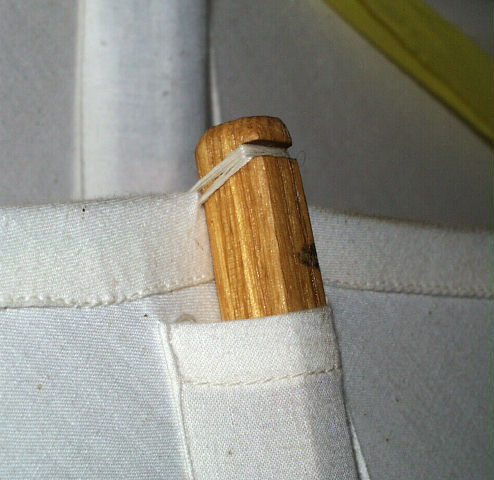
portable? The answer was in the original design! When the Wright brothers
built their glider in 1902, they spliced two boards together to make spars
29-1/2 feet long. They pinned and wrapped the scarf joint between the
boards with waxed linen cord, permanently joining them. We simply pinned
the joints, securing the pins with hairpin clips. This makes it possible
to breakdown the wing section of the glider into four parts, each about 17
feet long. We can transport the glider in a small trailer and carry it
through an ordinary doorway. In fact, the first question we get from kids
when we set up in a school is always, "How did you get that thing in
here?"
There are other minor changes that were necessary to enable the glider
to break down. But for the most part it is true to history. Or, at least
as true to history as you can make an airplane for which the builders
never recorded construction details.
|

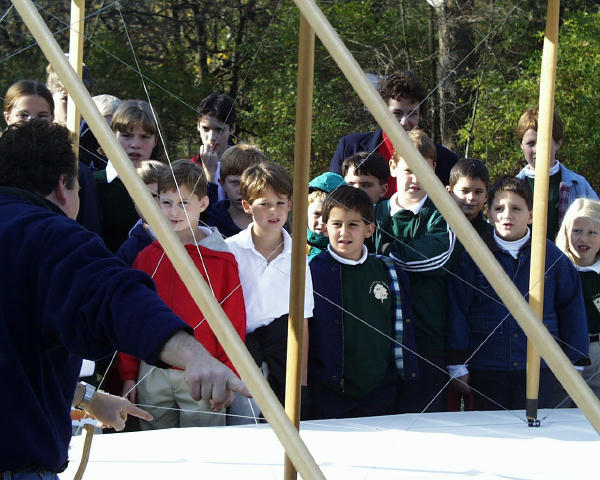
People build airplanes for many reasons. We built
this one to impress kids. It's the centerpiece of a "portable
museum" of the Wright Brothers that we take around to schools.
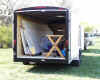
Although the Wright Brothers assembled the wings of
the glider so the wouldn't come apart, you can build it to knock down for
easy transport. We haul ours in a 7' x 18' trailer.
|
|
There are some old plans, fortunately. In 1934, the U.S. Army Air Corps
built two replicas of the 1902 Wright Glider. One was to be given to the
newly built national historic park at Kitty Hawk -
a gift from the people of Dayton, Ohio. The other was to be kept in the
Air Corps museum in Dayton. (You can still see the first replica at Kitty
Hawk. The second - the one kept in Dayton -
was run over by a truck.) The Air Corps folks who were assigned to this
project had at least one meeting with Orville Wright, who told them as
many details as he could remember. He also loaned them many of the photos
that were taken of the glider in 1902. From this interview and the photos,
the Air Corps made engineering drawings.
These drawings still exist in the archives of the U.S. Air Force
Museum, although some of them are in bad shape. With the permission of the
archive staff, we made digital images of the plans and used these as the secondary
source for our own drawings. Our primary source was, of course, the
photos. Of all the airplanes the Wright brothers made, the 1902 was
probably the most photographed. This seems to have been because Wilbur was
considering making some extra money on the lecture circuit in 1902, and he
needed the photos for lantern slides. Consequently, we have a good
photographic record of the glider from all angles.
Not surprisingly, the 1934 drawings don�t always jive with the
photos. The standards of aircraft conservation in 1934 -
well, there were no standards of conservation in 1934. If it looked good
from a few dozen feet away, it was good enough for museum work.
Consequently, there are many small errors in the drawings, especially with
the hardware used to assemble the glider. Possibly the largest of these is
the attachment of the front skids to the wing section. The drawings show a
metal bracket that holds the ends of the skids to the front edges of the
spars. This may have been correct for the glider in its original
configuration. But if you study the photos of the aircraft after the
Wrights added the rudder, you�ll see humps that indicate the skids were
attached to the top of the spars. Rick Young, who used these brackets in
the replica that he and Ken Kellet built, told me it was the only part of
the aircraft he had problems with. The Wrights probably had the same
problem and switched to a stronger design. Not a big deal perhaps, but a
deal nonetheless.
The Air Corps also used some machined parts and commercial hardware
that common sense told us wasn�t available to the Wrights in Kitty Hawk
in 1902. Remember that the Wrights were running an aerodynamic research
laboratory in a remote part of the world that was a three-day journey to
the nearest hardware store in good weather. They made repairs to the
glider and changed its configuration almost every time they flew it. They
couldn�t anticipate their hardware needs (other than basic items like
screws) and they couldn�t afford the time it took to run and buy special
parts. What did they do?
|
The 1902 Wright Glider replica at Kitty Hawk, North Carolina was a
gift from the people of Dayton, Ohio and the U.S. Army Air Corps at Wilbur
Wright Field (now Wright-Patterson Air Force Base).
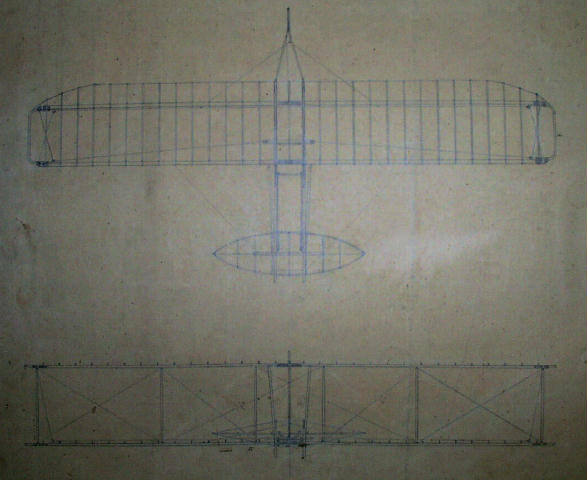
This is a portion of the 1934 Air Corps plans. The
draftsman consulted Orville before making these plans and may have had him
look them over when they were complete. There are some pencil corrections
on some of the sheets that look suspiciously like Orville's handwriting.
|
|
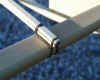
There is a strong hint at the probable solution in the 1934 drawings.
Many of the metal parts that are used as pivots, such as the attachment
between the ribs and the outriggers, are bent from 1/8-inch-diameter mild
steel rod. They aren�t attached with screws, but lashed to the wood. The
Wrights seemed to have an affinity for this design -
Wilbur�s drawing of their 1899 scientific kite shows wire hinges And the
strut fittings that join the wings to the struts -
one of the few pieces of Wright hardware for which they made drawings -
are sophisticated wire hinges.
Wire hardware would have solved a multitude of problems for the
Wrights. They could have taken a small supply of 1/8-inch and
1/4-inch-diameter mild steel rod with them to Kitty Hawk and made any part
they needed. Most probably, they heated the steel on their gasoline stove
then bent it on a hardwood block using nails or screws as bending pins. By
lashing this homemade hardware to the parts of their glider, they
conserved screws and eliminated the need to bring a supply of many
different screw sizes with them. And the lashing itself would have added
structural strength to those critical connections. Screws might have
caused the wood to split during a hard landing; lashing compressed the
wood and prevented it from splitting.
In the 1934 drawings, flat hardware such as brackets were often made
from 16-gauge mild steel plate. This, too, seems to fit the circumstances.
The Wrights could have included a supply of steel straps in their tool
kit, then bent the parts they needed either by taking a small vise with
them or rigging a vise from two pieces of hardwood and a couple of clamps.
This strap hardware was always screwed in place on the Air Corps drawings,
but there�s no reason it couldn�t have been lashed if the Wrights had
needed to do so. We followed the Air Corps' lead when their engineering
drawings showed a piece of hardware that seemed to fit the special
circumstances at Kitty Hawk. But we devised simple wire or strap hardware
for those connections that showed store-bought hardware, especially if we
suspected these connections had been altered or repaired during the 1902
test flights.
|
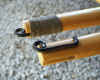
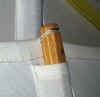
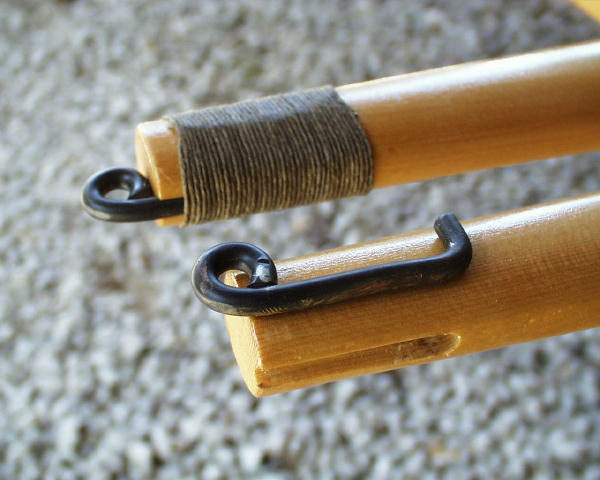
Much of the hardware on the glider is bent from
1/8-inch and 1/4-inch-diameter mild steel rod, then lashed to the wooden
parts. |
|
In addition to doing a little blacksmithing, we also had to learn
something about marlinship to construct this airplane. Marlinship is
a crusty old word that is little used today, but it was a skill that
almost every Victorian boy learned when he was old enough to tie his
shoelaces. The last vestige of marlinship that survived the turn of the
twenty-first century is the knot-tying section of the Boy Scout
Handbook. Marlinship was a crucial skill for a handyman when the
Wright brothers were building gliders, and waxed lined cord was the
Victorian equivalent of duct tape. By using this material to hold the
airframe together, the Wrights made it able to withstand hard landings -
each joint would give slightly when stressed then return to its original
position. And if a part did break, it was easy to repair. Just cut the old
lashes and lash in a new part.
The Wrights used two knots over and over in making building the glider
frame. The ribs are attached to the spars with saddle lashes. Almost all
the remaining parts, including most of the hardware, are attached with
whiplashes. The waxed linen cord, we quickly found out, is magic stuff for
lashing. Because the cord is waxed, it sticks to itself or the wood while
you tie off the knot. As a result, it�s much easier to make a tight lash
- you don�t have to hold the tension of the
cord while you tie the knot. We also found out that this cord will eat
your hands when you lash a row of ribs. A pair of close-fitting leather
gloves with the fingertips cut out are an important piece of equipment for
good marlinship - something the Boy Scouts fail
to mention.
|
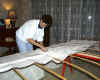
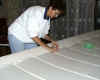
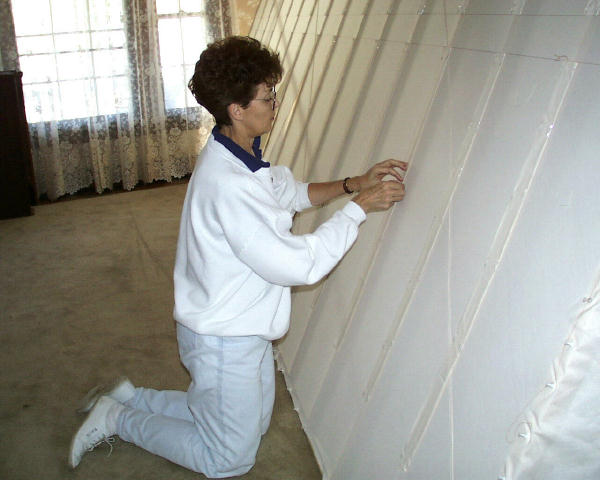
Much of the glider frame is lashed together. For
example, the ribs are attached to the spars with saddle lashes. |
|
Skinning the completed airframe was a bit more familiar, but just
barely. The Wrights used a fabric called Pride of the West-brand
muslin. It was a finely woven 100 percent unbleached cotton with 102
threads per inch in the warp and 107 in the weft, or the thread count of
209, and was commonly used for ladies undergarments. We got close with a
197 thread count unbleached cotton fabric called Made-Sew-Fine
muslin, but the thread weight (denier) is heavier, making it
thicker and heavier cloth than what the Wrights used. (This is available
through Jo-Ann Fabrics, but the thread count on the bolt will say
"200." That�s a little optimistic. According to the
manufacturer - Springs of South Carolina -
it has 104 threads per inch in the warp and 93 in the weft.) On the next
replica of this glider, which we are building for the Crawford
Transportation Museum in Cleveland, we will come very, very close with a
213 thread count "glider cotton" available from Ross Walton at
World War 1 Originals. Anticipating the need for a cotton aircraft skin
suitable for covering pioneer replicas and restorations as the Centennial
of Flight approaches, Ross had a Belgium weaver manufacture a few thousand
yards of this fabric. It�s pricey, but it�s as close to authentic as
you�re likely to get.
The fabric is installed on the bias, with the warp and woof running 45
degrees to the ribs and spars. We had to cut the bolts of cloth apart,
then sew them back together so the weave ran diagonally. Oriented thus,
every thread in the fabric becomes a cross brace, adding a great deal of
strength to the structure. I had my doubts about a lashed-together
framework until we skinned it, then I was surprised at how strong it
became. The wing covering, not the lashing, seems to hold the wings
together.
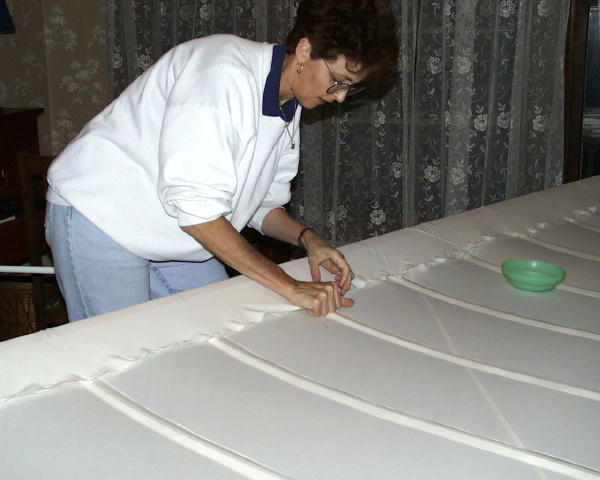
The fabric must be fitted to the frame the way a tailor fits a
good suit. Apparently, this wasn�t a big deal for the Wright brothers.
Their mother was a highly skilled seamstress and this was one of the many
talents she passed on to her sons. Friends of the family claimed that
Wilbur could sew a shirt or a dress "as well as any woman." The
Wrights apparently tailored each wing covering to fit, sewing individual
pockets for each rib and a hem in the trailing edge. We did the same. Then
we cut the back saddle lashes on the ribs, slipped the ribs into their
pockets, and re-tied the lashes. The rest of the work, including the cloth
fairings that cover the rear spars, was all done by hand.
|
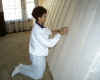
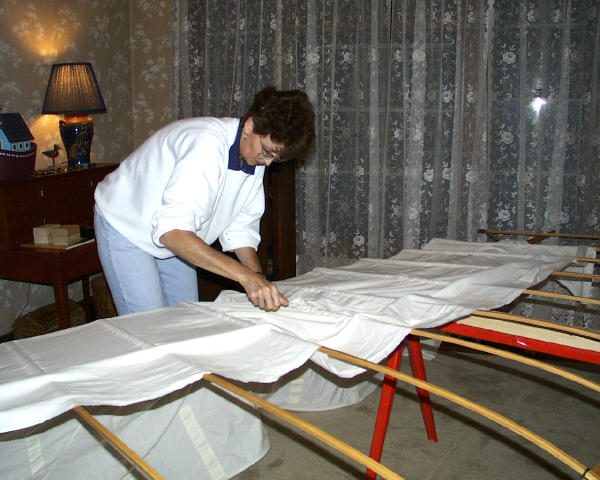
We assembled the wing coverings on a large frame,
pinning and sewing the ribs pockets in place.
We cut the lashes the held the ribs to the back
spars and slipped the ribs into the pockets...
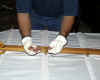
...then we retied the back lashes.
With the cover in place, we lashed the trailing edge
to the end of the ribs with quilting thread...
...and stretch the leading edge over the front spar
and pinned it to itself. We then sewed it in place.
|
So how does it fly? It depends on your historical perspective. We took
it with us to Kitty Hawk on October 22, 2000, the centennial of the Wright�s
first gliding flights. We flew our replica of the 1900 Wright Glider on
the centennial with champion hang glider pilot Dudley Mead at the
controls. The next day, October 23, we set up the 1902 glider and both
Dudley and I made flights. It was wonderfully exhilarating and incredibly
frightening. This is a very primitive aircraft, and it behaves like it. It
is not stable; the Wrights disdained stability, I�ve come to believe.
The pilot must fly the craft at all times. The pitch control is very
responsive - overly responsive, in fact -
while the roll is sluggish. There is no such thing as a landing. You
simply pancake into the sand. I was amazed throughout the whole experience
that no matter how hard we tried to smack the glider against a sand dune,
it absorbed the punishment with little complaint. And, quite frankly, it
was awe-inspiring beyond words just to see it in the air.
The Wright brothers were most probably just as awed, but for very
different reasons. Unlike Dudley and myself, they had never flown anything
that flew as well as this glider. While we had our problems controlling
it, the Wrights were elated that their 1902 glider could be controlled,
period. What felt sluggish to us was to them the Ferrari of the air.
It was enough to convince Wilbur and Orville to abandon whatever
ambitions they had for giving lectures on gliding and go for the Big One,
the brass ring of aviation, the first controlled, sustained powered
flight.
|

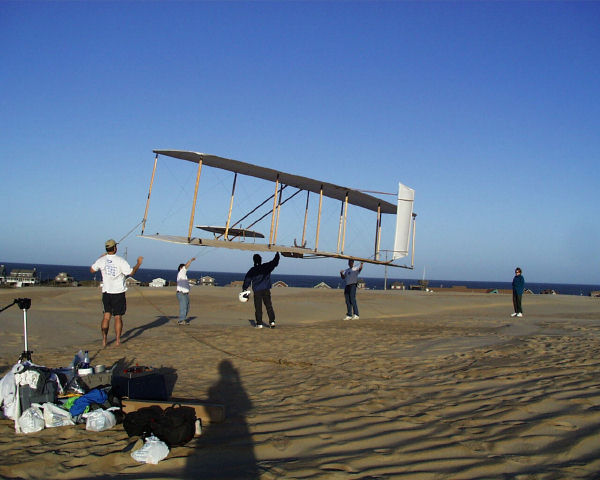
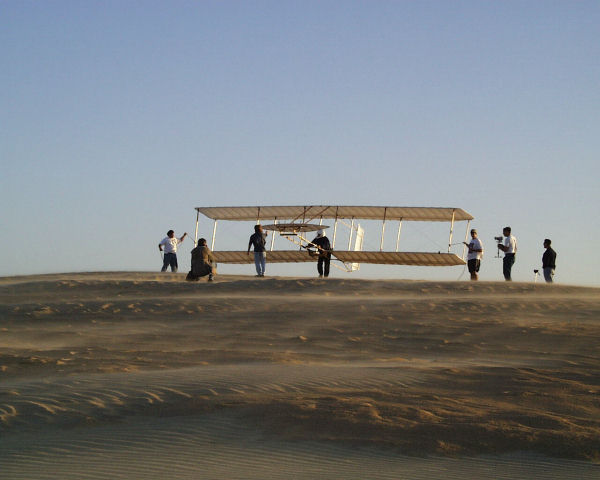
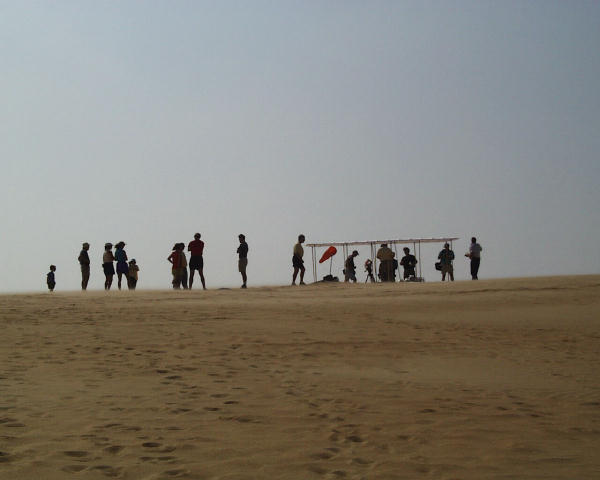
Kiting the 1902 Wright Glider replica at Jockey's
Ridge State Park, just a few miles south of Kill Devil Hill.
Getting ready to launch the glider.
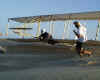
We're off!
|
You're Invited!
Whether or not you build this glider, we invite you to join us at Kitty
Hawk and watch us fly ours. We try to make a pilgrimage each year on the
weekend nearest October 8, the anniversary of controlled flight. (Orville
and Wilbur first flew with 3-axis control on October 8, 1902.)
We started doing this in 2000 to help draw attention to the upcoming Centennial of Flight in
2003. We continue to renew the bonds that we've formed with people on the
North Carolina Outerbanks, to see old friends, and have a blast reliving a
piece of history that is precious to everyone who flies. Meet us at Jockey�s Ridge State Park in Nags Head,
North Carolina. It�s just a few miles south of Kill Devil Hill and it�s
the only patch of undeveloped sand left on the Outerbanks. It�s also a
haven for hang gliders. If you do build a replica and you want to fly it, you
must have a "Hang 1" hang gliding
certificate or better to pilot the glider inside the boundaries of the
state park. |
We have a small celebration atop a dune each time we
fly our gliders. We especially welcome the participation of young
people. If you have a class or a home-schooled group, and would like
them to experience this unique event, get in touch and let us know you're
coming. |
Back to the top
|

