WRIGHT BROTHERS Aeroplane Company

(as told by Nick Engler)

Back Home Up  

lying the Wright Kite is a lot like playing the violin -- it looks easier than it is. When I first tried to fly the kite, I was expecting it to be just a little more challenging than flying a regular kite -- and I couldn't have been more wrong. The Wright Kite is extremely challenging, and I was just miserable at flying it. Part of this was because we hadn't yet discovered that the camber was too deep, but a lot of it was because I hadn't yet acquired the piloting skills needed to keep this beast in the air. Gradually, as we collected more data and ran more experiments, we made the kite a little easier to fly and I got a little better at flying it. But it's still a challenge.

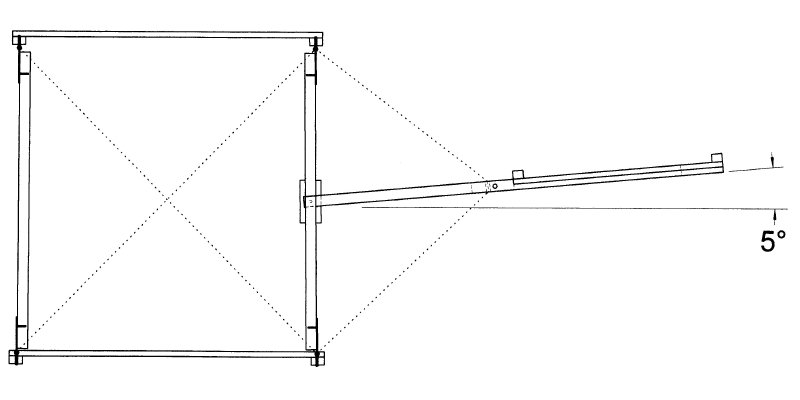
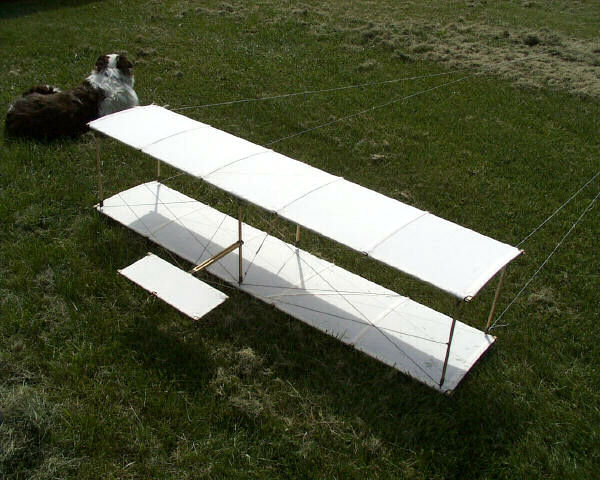
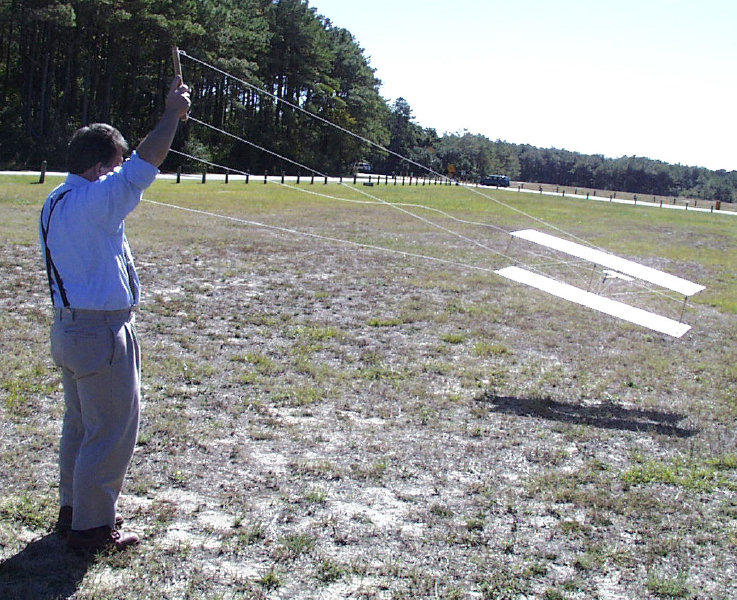
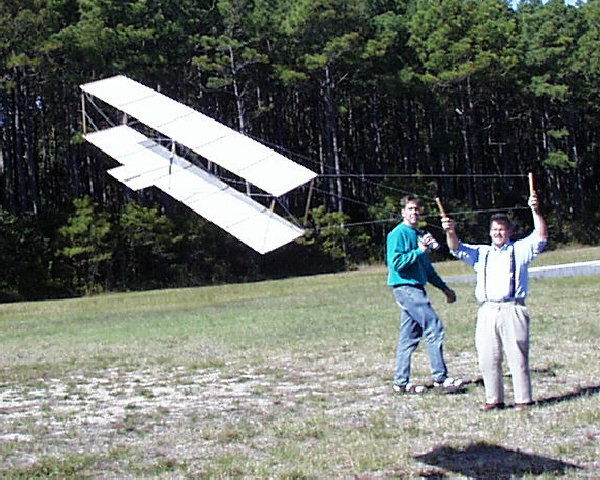
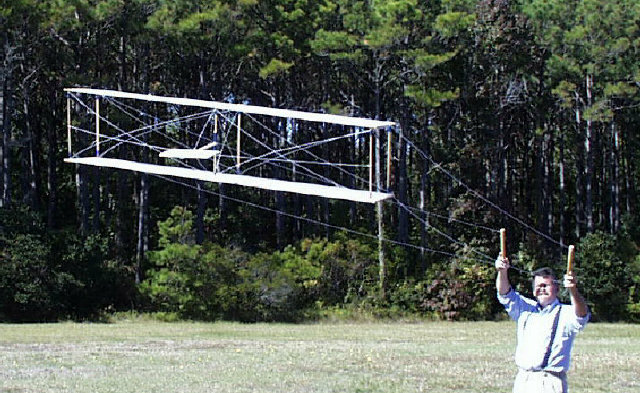
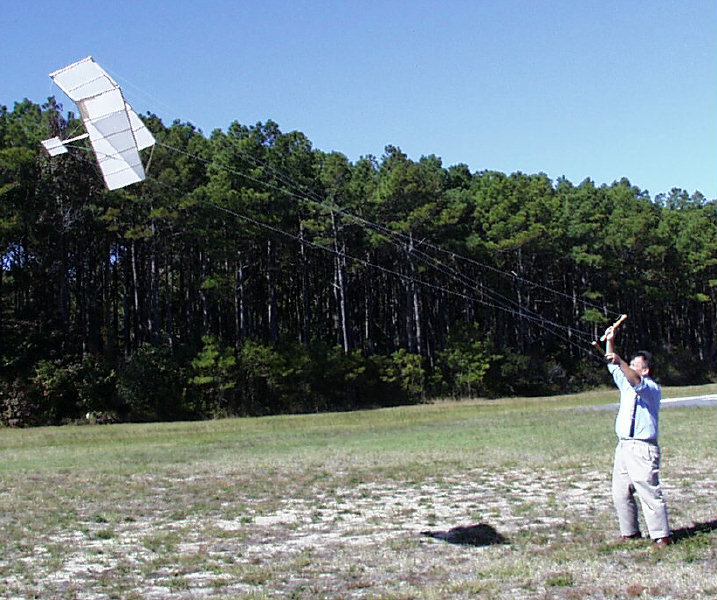
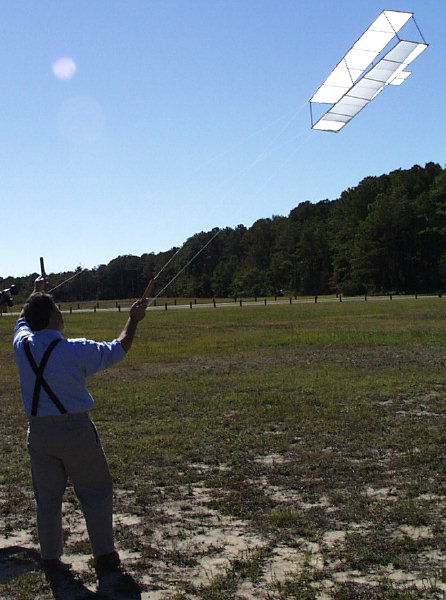
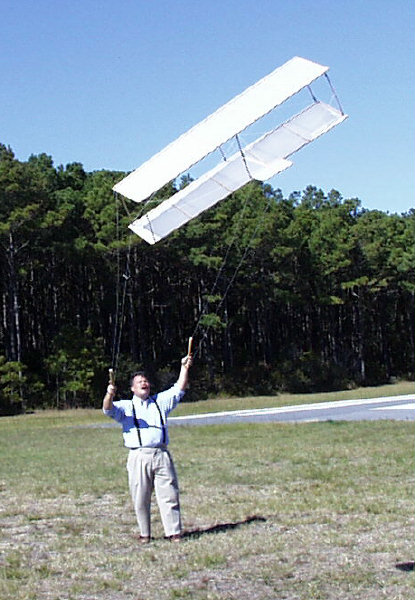
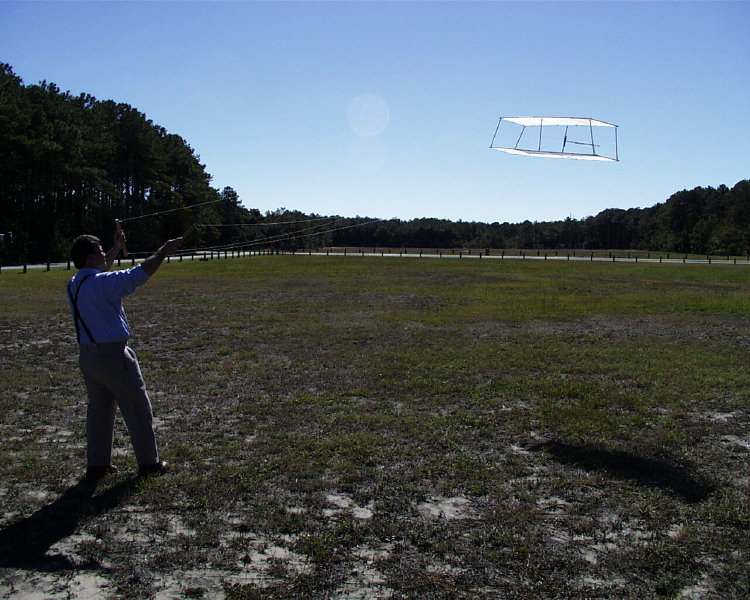
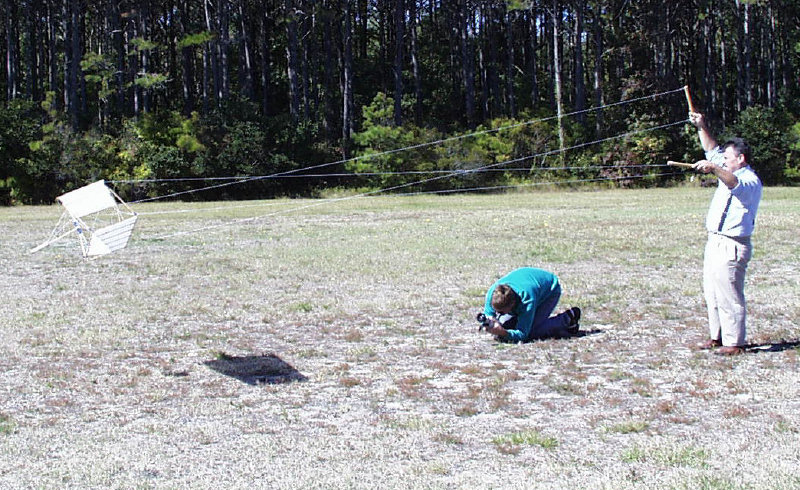
So my first advice to you aspiring Wright Kite pilots is to grit your teeth and bear it. Prepare to live with the crashes, the torn wings, the busted ribs, and the frustrations until you gain a little experience. If you hang in there and practice, you'll gradually learn the skills you need to make it look easy.

The first thing you need to learn is patience. This kite requires a strong, steady wind to fly it properly, and you may have to wait for the weather. The stronger the wind, the better it will fly. Why? Because in order for the controls to be effective, there must be some tension on the control lines. The stronger the wind, the greater the tension. If you try to fly the kite in a light breeze, you won't be able to control the kite. Pulling on the control lines will simply pull the kite toward you rather than warp the wings.

How much wind? That depends on the kite. The historic replica is fairly heavy as kites go and requires at least a 15-mile-per-hour wind just to develop the lift it needs, and 20 miles per hour for good control. The Not Quite Wright Kite is much lighter and will fly in half as much wind. But you won't be able to control it until the wind is blowing over 12 miles per hour.

Tip: We found that drag on the kite helped increase the tension needed for control, but drag on the control lines decreased control. So we rig our kites with ordinary twine (which is pretty draggy) and use "dragless" kite string (available at most kite stores) for the control lines.

Keep you control lines short. The longer the control lines, the longer the delay between your control input and the time when the kite's wings begin to warp. Anything over 15 feet makes it very difficult to warp the wings in time to avoid a crash. I'm most comfortable with the control lines somewhere between 8 and 10 feet long.

You must also make sure all four control lines are precisely the same length. If there is any discrepancy between them, it will make it difficult to get a "feel" for the kite when it's flying.

When you first start out, don't try to do too much at once. I found out the hard way that it's almost impossible to control both roll and pitch when you're a novice. I tied two X-braces running fore to aft between the middle struts to keep the elevator steady during my initial pilot's training. I also rigged the elevator so it was angled up slightly from the plane of the wings. When the kite was flying, this slight up angle kept it from nosing over and going into a dive while I wrestled with the roll control.

Click on a photo or illustration to enlarge it.


Would you like to see a short QuickTime video of me flying the kite? Click on the kite above. (It's a .mov file, 765K, shot by David Garrigus Productions.)


Rig the control lines according to Wilbur's 1912 diagram. Attach the control lines to the ends of the control sticks and the ends of the front outboard struts.

Kite rigging.jpg (24142 bytes)
For the initial flights, rig the kite with fore-and-aft bracing strings between the center struts ONLY. Rig the tail so it's angled up about 5 degrees.

Ready to fly s.jpg (70783 bytes)
To prepare the kite for launch, simply rest it on the ground. Attach the control strings to the ends of the two control sticks and the ends of the two outboard struts, as Wilbur shows in his diagram. Check that all four strings are the same length.
Kite take off s.JPG (177811 bytes)
If the wind is strong enough, you can launch the kite like an airplane. With it resting on the ground, tug on the two bottom strings and the kite will begin to rise. In lighter winds, have someone hold it up as high as possible and tug on the  bottom strings.
Kite launch.jpg (109475 bytes)
If the wind is steady, the kite will begin to fly. Resist the temptation to run with the kite to get it into the air -- it doesn't work. You must be turned toward the kite and facing it at all times. I have launched the kite by walking backward briskly, but this has it's own dangers.
Flying kite 4s.jpg (108965 bytes)
You must begin to control the kite the moment it leaves the ground. If you have trouble launching and getting control of the kite, try shortening the control lines. Remember, the longer the strings, the longer the delay between your control movements and the time the kite actually responds.
Rolling Kite s.jpg (142208 bytes)
Here's how to roll the kite -- angle the control sticks in opposite directions. Normally, you shouldn't have to angle them this far. Wilbur's diagram shows the control lines crossed -- apparently he turned the sticks end for end from the way I hold them. Maybe this made flying easier for him, but it didn't for me. Each to his own.
Flying kite 2 s.jpg (77684 bytes)
Once you've gotten a little practice, you should be able to make slower, gentler rolls without warping the wings overmuch. If the kite continues to act squirrelly, check the wind. Is it gusty? That'll do it. Also check your surroundings. Are you flying near trees or buildings? These can interfere with the wind, causing "waves.".
Climbing kite.jpg (78214 bytes)
Once you get a good, steady wind, practice rolling the kite back and forth until you can keep it aloft for long periods of time. (For me, that's about five minutes.)  Loosen the fore-to-aft bracing strings so there's just a little play in them and you can rock the wings back and forth and inch or two without twisting them.
Landing s.jpg (44331 bytes)
Launch the kite, get it flying steadily, and try to make it dive or climb by putting in a little pitch control. Do this by angling the control sticks in the same direction. As the wings rock, the tail will go up or down. This, in turn, will cause the kite to nose down or nose up. If the kite dives or climbs to fast, you may have loosened the bracing strings too much.
Flying kite 5s.jpg (137087 bytes)
This will probably be the most difficult part of your pilot training -- learning the control the pitch and the roll together. When you get the hang of doing both at the same time , you can fly the kite low to the ground...
Flying Kite s.jpg (58854 bytes)
High in the air...
Flying kite 3s.jpg (61827 bytes)
Or anywhere in between.
Kite landing s.JPG (175902 bytes)
And once in a while, if you're extremely good (or extremely lucky), you can even bring it in for a landing.

Back Home Up

Back to the top